How to Install Single Node OpenStack on CentOS 7
In this tutorial, we will be installing a single node OpenStack on an Alibaba Cloud ECS instance with CentOS 7.
By Ghulam Qadir, Alibaba Cloud Tech Share Author. Tech Share is Alibaba Cloud’s incentive program to encourage the sharing of technical knowledge and best practices within the cloud community.
OpenStack is a free and open-source software platform which provides IaaS (infrastructure-as-a-service) for public and private clouds.
OpenStack platform consists of several inter-related projects that control hardware, storage, networking resources of a datacenter, such as: Compute, Image Service, Block Storage, Identity Service, Networking, Object Storage, Telemetry, Orchestration and Database.
Though OpenStack’s core function is to provide an IaaS platform, it is used as a DBaaS (database-as-a-service), building Hadoop clusters, Container orchestration and much more. The administration of those components can be managed through the web-based interface or with the help of OpenStack command line.
This tutorial will show you how you can deploy your own private cloud infrastructure with OpenStack installed on a single node by using rdo repositories, although the deployment can be achieved on multiple nodes. We will be deploying this service on Alibaba Cloud Elastic Compute Service (ECS) instances with CentOS 7.
- Hostname = openstack.example.com
- IP address = 192.168.1.40
- netmask = 255.255.255.0
- Gateway = 192.168.1.1
- DNS = 192.168.1.254
Prerequisites
- You must have Alibaba Cloud Elastic Compute Service (ECS) activated and verified your valid payment method. If you are a new user, you can get a free account in your Alibaba Cloud account. If you don’t know about how to setup your ECS instance, you can refer to this tutorial or quick-start guide.
- You should set up your server’s hostname.
- Access to VNC console in your Alibaba Cloud or SSH client installed in your PC.
After completing the prerequisites, login as root user with your root username & password via SSH client (e.g. Putty) or VNC console available in your Alibaba Cloud account dashboard.
Make sure your system has at least 16GB of RAM and a processor with VT support. Check the VT support using the below command.
egrep --color 'vmx|svm' /proc/cpuinfo | wc –lOutput: (should not be zero)
2Initial System Configurations
- Before you begin preparing the node in order to deploy your own virtual cloud infrastructure, first login with root account and assure that the system is up to date.Make sure your machine has the latest version of CentOS 7 on the machine.
yum -y update - Next, issue the ss -tulpn command to list all running services.
Ss -tulpn
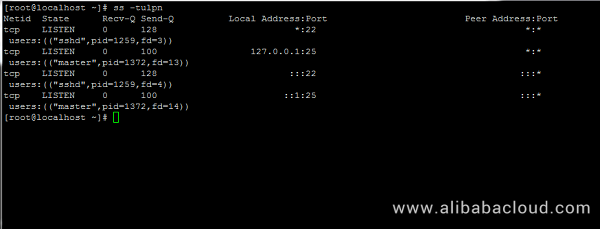
Now identify unnecessary services, stop, disable and remove them. Primarily Postfix, NetworkManager and Firewalld. After that, the only service that would be running on your linux machine should only be sshd.
 # systemctl stop postfix firewalld NetworkManager
 # systemctl disable postfix firewalld NetworkManager
 # systemctl mask NetworkManager
 # yum remove postfix NetworkManager NetworkManager-libnm
Permanently disable Selinux policy on your linux machine by executing the following commands. Also edit /etc/selinux/config file and modify SELINUX from enforcing to disabled as show in the image below.
 # setenforce 0
 # getenforce
 # vi /etc/selinux/config
On the next step using the hostnamectl command to set your Linux system hostname. Replace the FQDN variable accordingly.
# hostnamectl set-hostname cloud.centos.lan
Lastly, install ntpdate in order to synchronize time with an NTP server.
# yum install ntpdateInstall OpenStack in CentOS and RHEL
OpenStack will be deployed on your Node with the help of PackStack package provided by rdo repository (RPM Distribution of OpenStack).
In order to enable rdo repositories on RHEL 7 run the below command.
# yum install https://www.rdoproject.org/repos/rdo-release.rpmOn CentOS 7, the Extras repository includes the RPM that actives the OpenStack repository. Extras is already enabled, so you can easily install the RPM to setup the OpenStack repository:
 # yum install -y centos-release-openstack-mitaka
 # yum update –y
Let’s install Packstat package on your linux machine using the following command:
# yum install openstack-packstackOn the next step generate an answer file for Packstack with the default configurations which will be later edited with the required parameters in order to deploy a standalone installation of Openstack (single node).
The file will be named after the current day timestamp when generated (day, month and year).
 # packstack --gen-answer-file='date +"%d.%m.%y"'.conf
 # ls
Now edit the answer file with your favorite text editor.
vi 26.07.18.confand replace the following parameters to match the below values. In order to be safe replace the passwords fields accordingly.
CONFIG_NTP_SERVERS=0.ro.pool.ntp.org
CONFIG_PROVISION_DEMO=n
CONFIG_KEYSTONE_ADMIN_PW=your_password for Admin user
Access OpenStack dashboard via HTTP with SSL enabled.
CONFIG_HORIZON_SSL=y
The root password for MySQL server.
CONFIG_MARIADB_PW=mypassword1234
After you finished editing save and close the file. Also, open SSH server configuration file and uncomment PermitRootLogin line by removing the front hashtag as illustrated on the below screenshot.
# vi /etc/ssh/sshd_config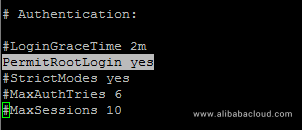
Then restart SSH service to reflect changes.
# systemctl restart sshd Start Openstack Installation Using Packstack Answer File
Finally start Openstack installation process via the answer file edited above by running the below command syntax:
# packstack --answer-file 13.04.16.conf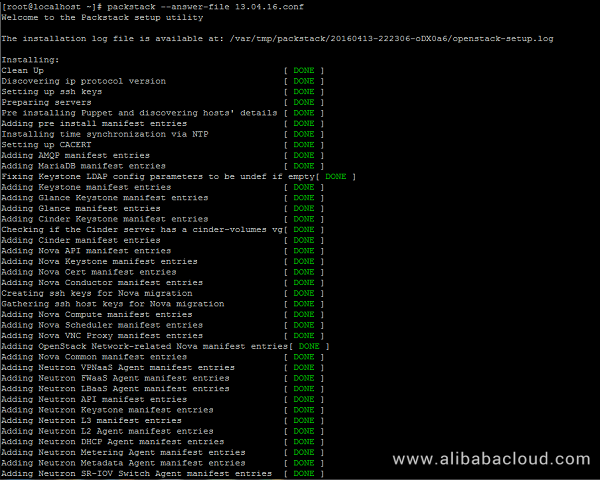
Once the installation of OpenStack components is successfully completed, the installer will display a few lines with the local dashboard links for OpenStack and Nagios and the required credentials already configured above in order to login on both panels.
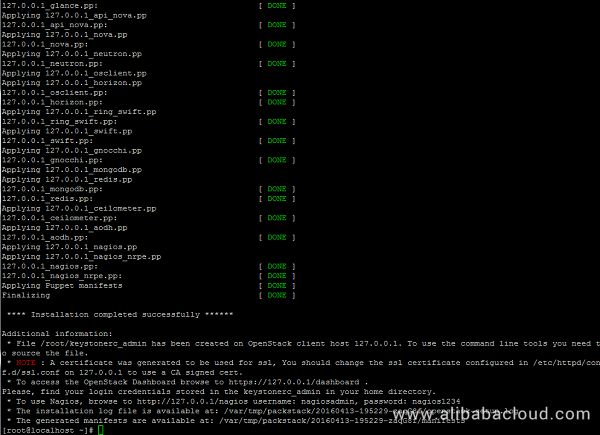
The credentials are also stored under your home directory in keystonerc_admin file.
If for some reasons the installation process ends with an error regarding httpd service, open /etc/httpd/conf.d/ssl.conf file and make sure you comment the following line as illustrated below.
#Listen 443 https
Then restart Apache daemon to apply changes.
# systemctl restart httpd.serviceNote: In case you still can’t browse Openstack web panel on port 443 restart the installation process from beginning with the same command issued for the initial deployment.
# packstack --answer-file /root/26.07.18.confRemotely Access OpenStack Dashboard
In order to access OpenStack web panel from a remote host in your LAN navigate to your machine IP Address or FQDN/dashboard via HTTPS protocol.
Due to the fact that you’re using a Self-Signed Certificate issued by an untrusted Certificate Authority an error should be displayed on your browser.
Accept the error and login to the dashboard with the user admin and the password set on CONFIG_KEYSTONE_ADMIN_PW parameter from answer file set above.
https://192.168.1.40/dashboard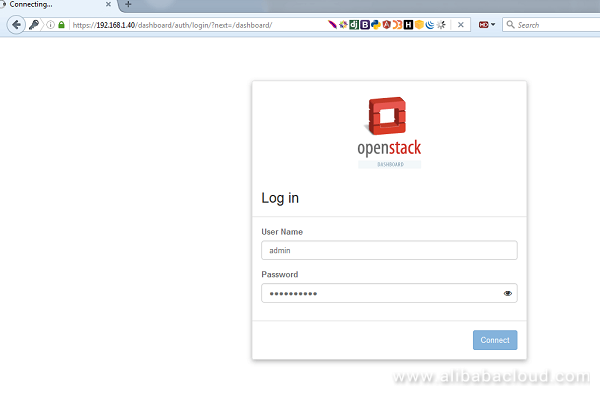
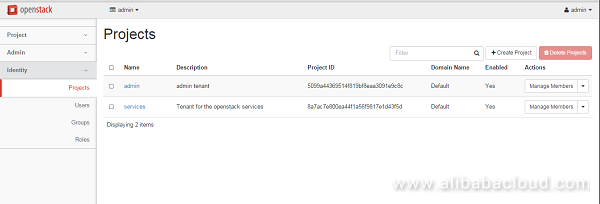
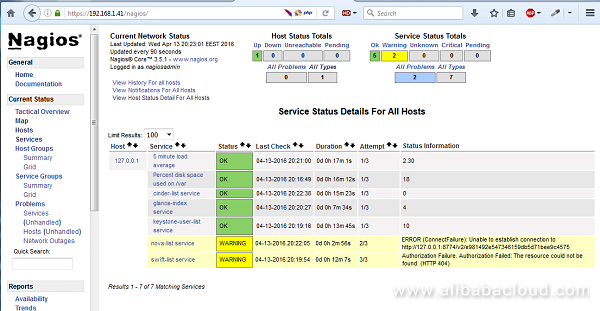
Alternatively, if you opted to install Nagios component for OpenStack, you can browse Nagios web panel at the following URI and login with the credentials setup in answer file.
https://192.168.1.40/nagios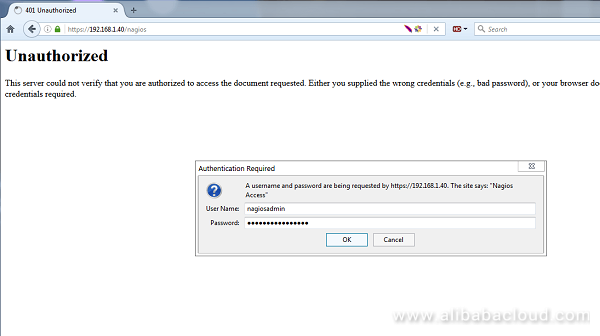
Configuration
OpenStack is a collection of open source project components that enable setting up cloud services. Each component uses similar configuration techniques and a common framework for INI file options.
This guide pulls together multiple references and configuration options for the following OpenStack components:
- Bare Metal service
- Block Storage service
- Compute service
- Dashboard
- Database service
- Data Processing service
- Identity service
- Image service
- Message service
- Networking service
- Object Storage service
- Orchestration service
- Shared File Systems service
- Telemetry service
OpenStack uses the INI file format for configuration files. An INI file is a simple text file that specifies options as key=value pairs, grouped into sections. The DEFAULT section contains most of the configuration options. Lines starting with a hash sign (#) are comment lines. For example:
 [DEFAULT]
 # Print debugging output (set logging level to DEBUG instead
 # of default WARNING level). (boolean value)
 debug = true

 [database]
 # The SQLAlchemy connection string used to connect to the
 # database (string value)
 connection = mysql+pymysql://keystone:KEYSTONE_DBPASS@controller/keystone
Options can have different types for values. The comments in the sample config files always mention these and the tables mention the Opt value as first item like (BoolOpt) Toggle…. The following types are used by OpenStack:
boolean value (BoolOpt)
Enables or disables an option. The allowed values are true and false.
 # Enable the experimental use of database reconnect on
 # connection lost (boolean value)
 use_db_reconnect = false
floating point value (FloatOpt)
A floating point number like 0.25 or 1000.
 # Sleep time in seconds for polling an ongoing async task
 # (floating point value)
 task_poll_interval = 0.5
integer value (IntOpt)
An integer number is a number without fractional components, like 0 or 42.
 # The port which the OpenStack Compute service listens on.
 # (integer value)
 compute_port = 8774
IP address (IPOpt)
An IPv4 or IPv6 address.
 # Address to bind the server. Useful when selecting a particular network
 # interface. (ip address value)
 bind_host = 0.0.0.0
key-value pairs (DictOpt)
A key-value pairs, also known as a dictonary. The key value pairs are separated by commas and a colon is used to separate key and value. Example: key1:value1,key2:value2.
 # Parameter for l2_l3 workflow setup. (dict value)
 l2_l3_setup_params = data_ip_address:192.168.200.99, \
   data_ip_mask:255.255.255.0,data_port:1,gateway:192.168.200.1,ha_port:2
list value (ListOpt)
Represents values of other types, separated by commas. As an example, the following sets allowed_rpc_exception_modules to a list containing the four elements oslo.messaging.exceptions, nova.exception, cinder.exception, and exceptions:
 # Modules of exceptions that are permitted to be recreated
 # upon receiving exception data from an rpc call. (list value)
 allowed_rpc_exception_modules = oslo.messaging.exceptions,nova.exception
multi valued (MultiStrOpt)
A multi-valued option is a string value and can be given more than once, all values will be used.
 # Driver or drivers to handle sending notifications. (multi valued)
 notification_driver = nova.openstack.common.notifier.rpc_notifier
 notification_driver = ceilometer.compute.nova_notifier
port value (PortOpt)
A TCP/IP port number. Ports can range from 1 to 65535.
 # Port to which the UDP socket is bound. (port value)
 # Minimum value: 1
 # Maximum value: 65535
 udp_port = 4952
string value (StrOpt)
Strings can be optionally enclosed with single or double quotes.
 # Enables or disables publication of error events. (boolean value)
 publish_errors = false

 # The format for an instance that is passed with the log message.
 # (string value)
 instance_format = "[instance: %(uuid)s] "
Sections
Configuration options are grouped by section. Most configuration files support at least the following sections:
[DEFAULT]
Contains most configuration options. If the documentation for a configuration option does not specify its section, assume that it appears in this section.
[database]
Configuration options for the database that stores the state of the OpenStack service.
Substitution
The configuration file supports variable substitution. After you set a configuration option, it can be referenced in later configuration values when you precede it with a $, like $OPTION.
The following example uses the values of rabbit_host and rabbit_port to define the value of the rabbit_hosts option, in this case as controller:5672.
 # The RabbitMQ broker address where a single node is used.
 # (string value)
 rabbit_host = controller

 # The RabbitMQ broker port where a single node is used.
 # (integer value)
 rabbit_port = 5672

 # RabbitMQ HA cluster host:port pairs. (list value)
 rabbit_hosts = $rabbit_host:$rabbit_port
To avoid substitution, use
$$ , it is replaced by a single $. For example, if your LDAP DNS password is $xkj432, specify it, as follows:
 ldap_dns_password =
$$
xkj432
The code uses the Python string. Template.safe_substitute() method to implement variable substitution. For more details on how variable substitution is resolved.
Whitespace
To include whitespace in a configuration value, use a quoted string. For example:
ldap_dns_passsword='a password with spaces'Define an Alternate Location for a Config File
Most services and the -manage command-line clients load the configuration file. To define an alternate location for the configuration file, pass the –config-file CONFIG_FILE parameter when you start a service or call a -manage command.
Conclusion
We demonstrated OpenStack installation on Red Hat, CentOS and Fedora Linux. Now you can set up your own private cloud environment on Alibaba Cloud Elastic Compute Service (ECS) easily with OpenStack.

